User's Guide
This guide is for Jira users who want to understand how Content Retention Manager affects their content and how to use the app's end-user features.
Info
The features described in this guide are available to non-admin users in Standard edition only. In Lite edition, the app is only accessible to admins.
Accessing Content Retention Manager
In the Jira left side navigation, select Apps, then select Content Retention Manager.
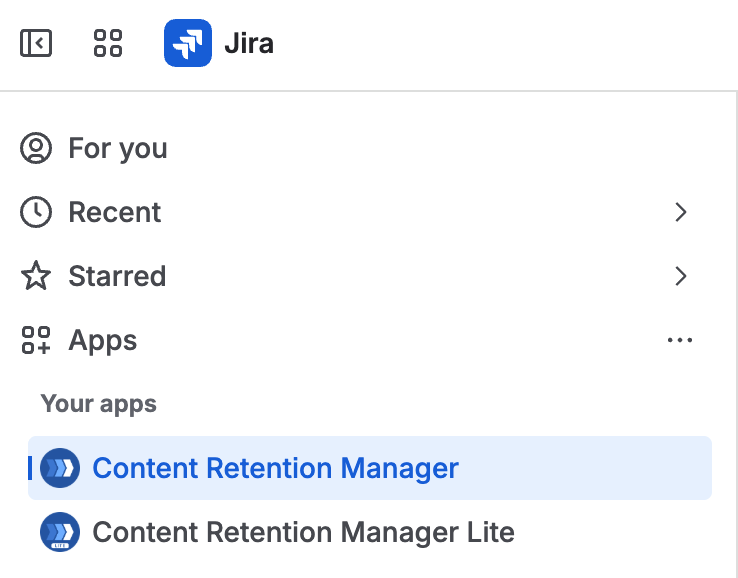
Opening Content Retention Manager from the Jira Apps menu
What You Can Access
What you can do depends on the permissions your Jira admin has configured:
- Work Item Panel: view retention status, applied policy, and classification level on individual work items you have access to, and change the classification level on work items you have edit access to (if the admin has enabled user classification permissions).
- Flags: mark a work item as needing removal, an update, or review, and clear a flag, if your admin has enabled flags for users.
- Content Audit tab: view retention status and act on work items you have access to, including classifying and archiving.
Admins control which of these capabilities are available to regular users through the User Permissions sections on the Policies and Classification tabs.
Understanding Retention Status on Your Content
Every work item in Jira has a retention status that reflects where it is in its lifecycle. See Retention Statuses and Discoverability for the full definitions.
The statuses most relevant to you as a user are:
- ENDING: Your content is approaching the end of its retention period. Review it and contact your admin if you believe it should be retained longer, or allow it to expire.
- ENDED: Your content has expired. Depending on your organization's automation settings, it may be scheduled for purging. Contact your admin if you believe this content should be retained.
- EVERGREEN: An indefinite extension is applied. This content will not expire under any retention policy.
Work Item Panel
To open the panel on a work item:
- Open the work item in Jira.
- Click the apps icon in the work item toolbar.
- Select Content Retention Manager.
The panel shows up to four cards side by side: Retention Status, Policy, Classification, and Flag, described below.
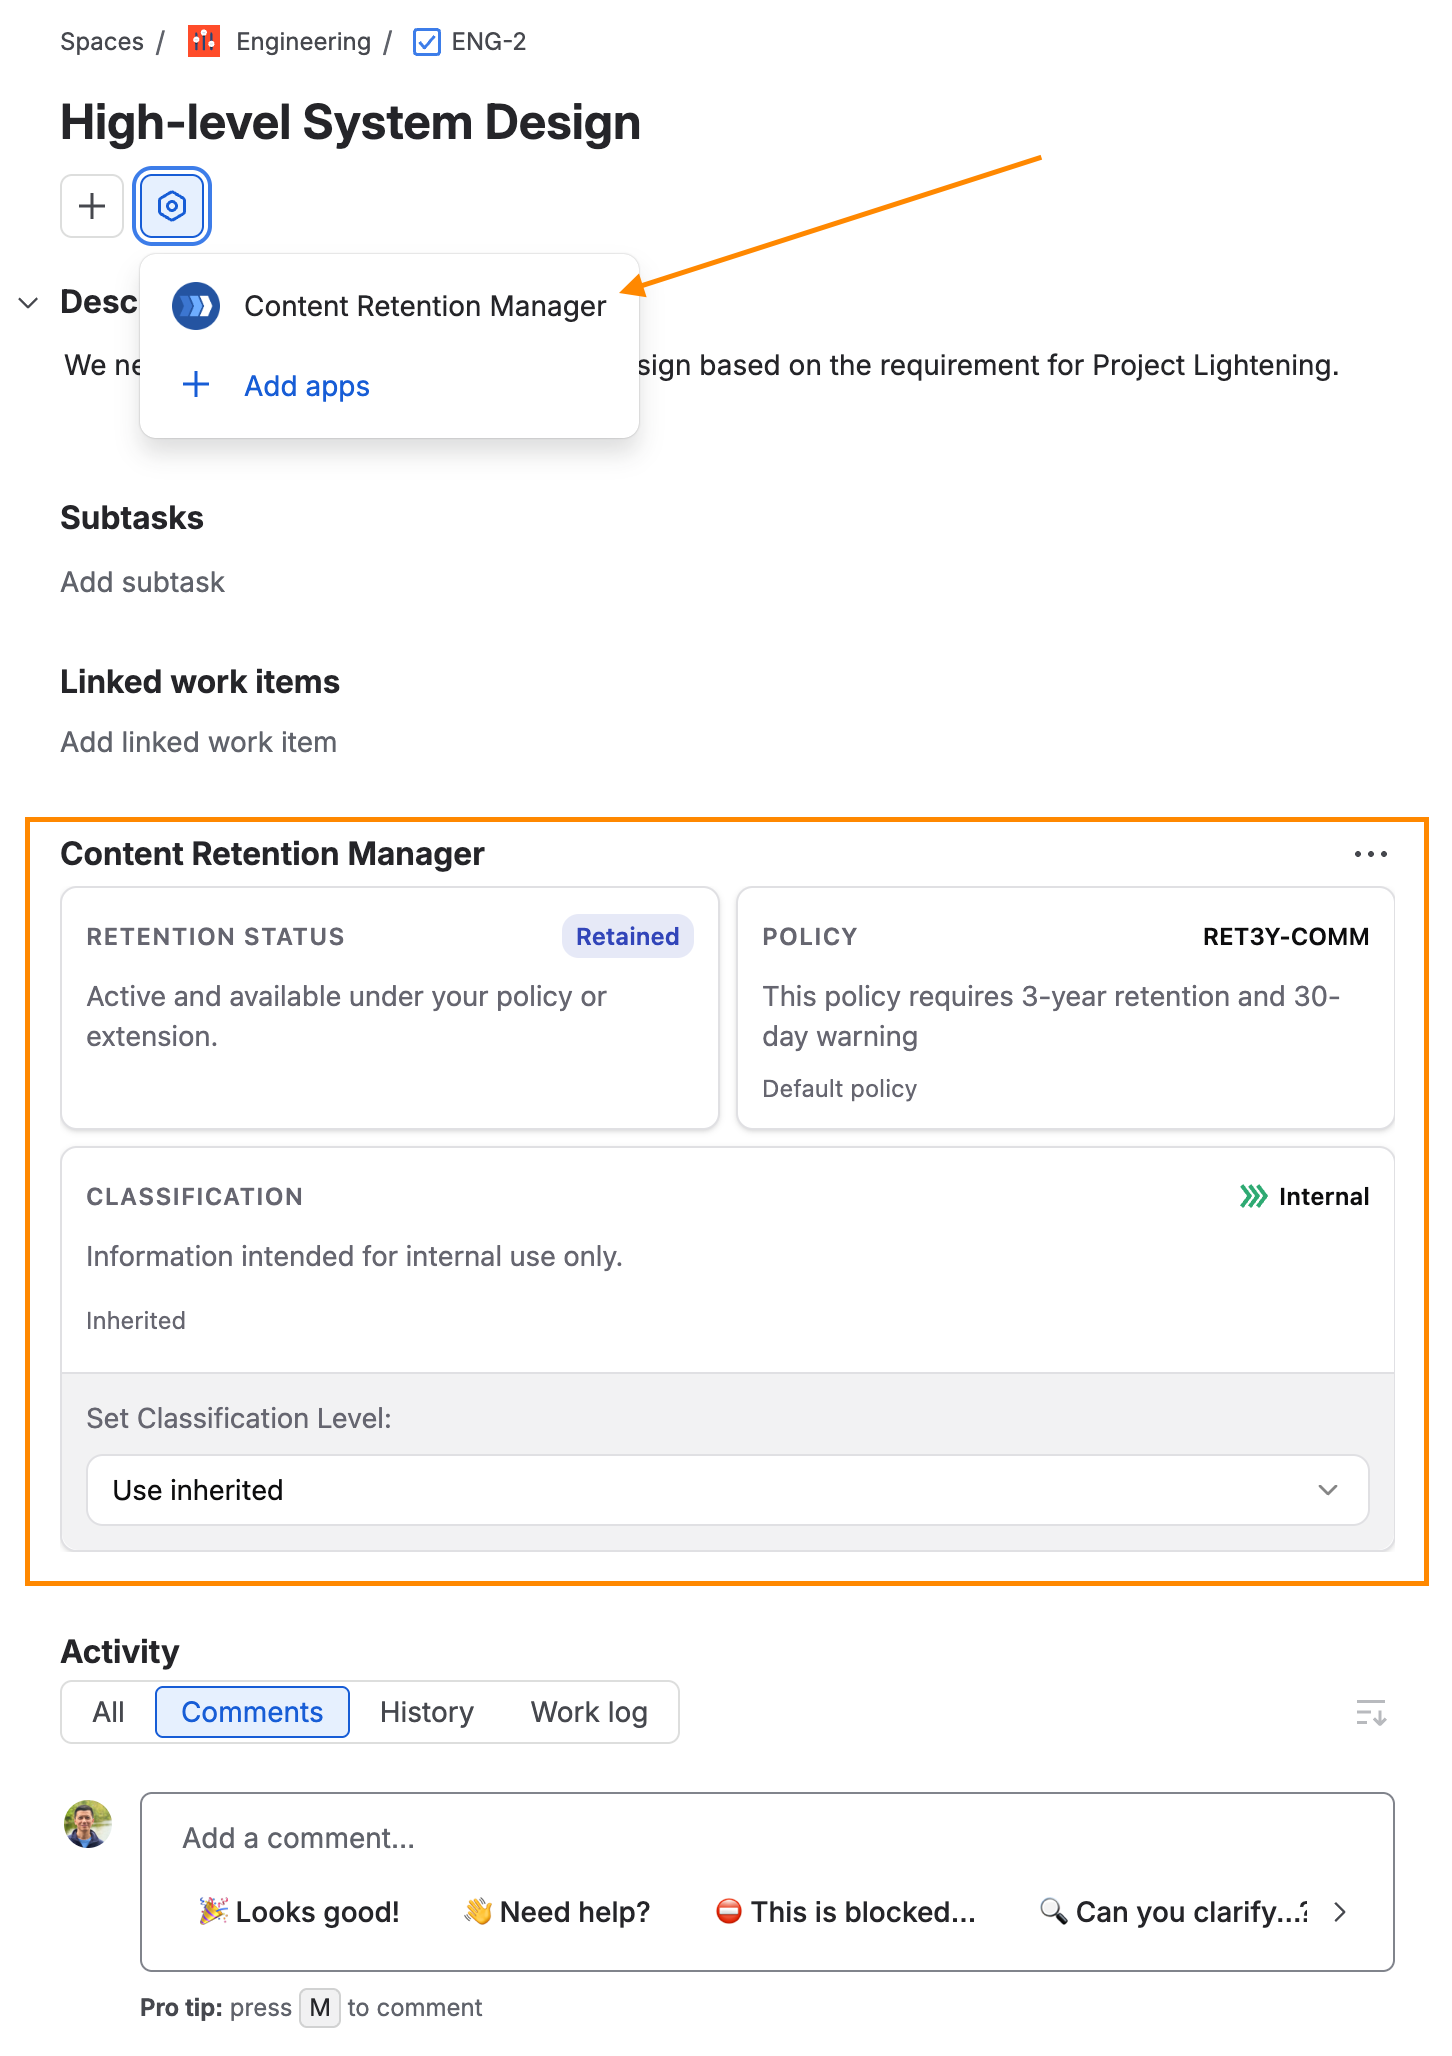
Opening the Content Retention Manager work item panel from the apps icon
Retention Status
The Retention Status card shows the work item's current status as a badge, with a short description of what it means. See Understanding Retention Status on Your Content above for what each status means for you.
Policy
The Policy card shows the applied policy code, a description of what it requires, and a source line explaining where it comes from (for example, a space rule, a per-content override, or the site default). This card only appears if your admin has enabled policy visibility for users, and is replaced by the Retention Status card alone when an extension (Extended or Evergreen) is active, since the extension supersedes whichever policy would otherwise apply.
Per-Content Classification
The Classification card shows the current classification level, a description, and a source line explaining how it was set (for example, a classification rule, a per-content override, or a user).
Changing the Classification Level
You can change the classification level from this panel on any work item you have Edit permission on, provided your admin has enabled user classification permissions:
- Use the dropdown in the Classification card to select a new level, or search for a level by name.
- The selected level is saved immediately and overrides any space rule or global default for this work item.
Tip
Selecting Use inherited removes your per-content override and restores the effective classification from space rules and the global default. If Use inherited isn't available for your current level, or another level doesn't appear in the dropdown at all, your admin has restricted non-admin users from removing or assigning it.
Flagging Content
Flags are available in Standard edition only. The Flag card appears only when your admin has enabled flags for users.
Use a flag to tell admins that a work item looks stale or needs another look. A flag is a suggestion. It doesn't delete anything or change the retention policy.
To flag a work item you can read:
- Open the work item, click the apps icon in the work item toolbar, and select Content Retention Manager.
- In the Flag card, open the list of flags. Each flag shows its color icon, name, and description.
- Select a flag. It saves right away.
- To explain your choice, type a reason of up to 255 characters in the box that appears, then click Add reason. Click Skip if you don't want to add one.
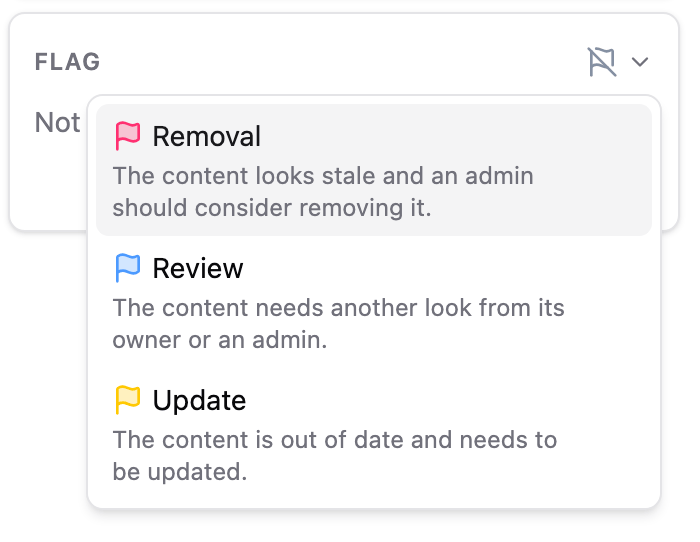
Choosing a flag in the Flag card
The card then shows the flag, who flagged the work item, and an expandable Reason. A work item has one flag at a time, so choosing a different flag replaces the current one. To add a reason later, clear the flag and flag again.
Clearing a Flag
To remove a flag, follow these steps:
- Open the work item, click the apps icon in the work item toolbar, and select Content Retention Manager.
- In the Flag card, open the list of flags.
- Select Clear flag, which appears at the top of the list while the content is flagged.
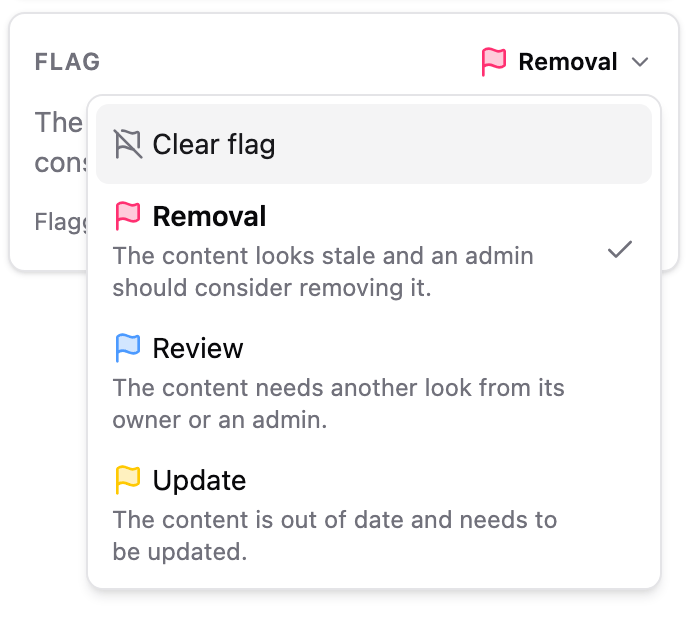
The flag list, with Clear flag at the top
This option appears only when your admin lets users view and clear flags. If the card tells you that you don't have permission to flag this content, you can see flags but can't set them.
A flag also clears by itself after someone edits the work item, because an edit shows that someone still maintains it. This can take up to 24 hours.
Content Audit
The Content Audit tab shows work items where you are the creator, reporter, or assignee, along with each item's retention status, classification level (if your admin has enabled classification visibility), and applied policy and its source (if your admin has enabled policy and policy-source visibility, independently of each other). The Relationships column shows which of these roles you have on that item.
Work items you have access to but haven't interacted with won't appear in the Content Audit tab. Only work items where you've taken an active role are listed here.
If your admin lets users view flags, the table also has a Flag column, and you can filter by Flag to find content that has been flagged. See Reviewing Flagged Content. Use the filter toolbar and Search to narrow down to specific items, and Export to download the current view as a CSV.
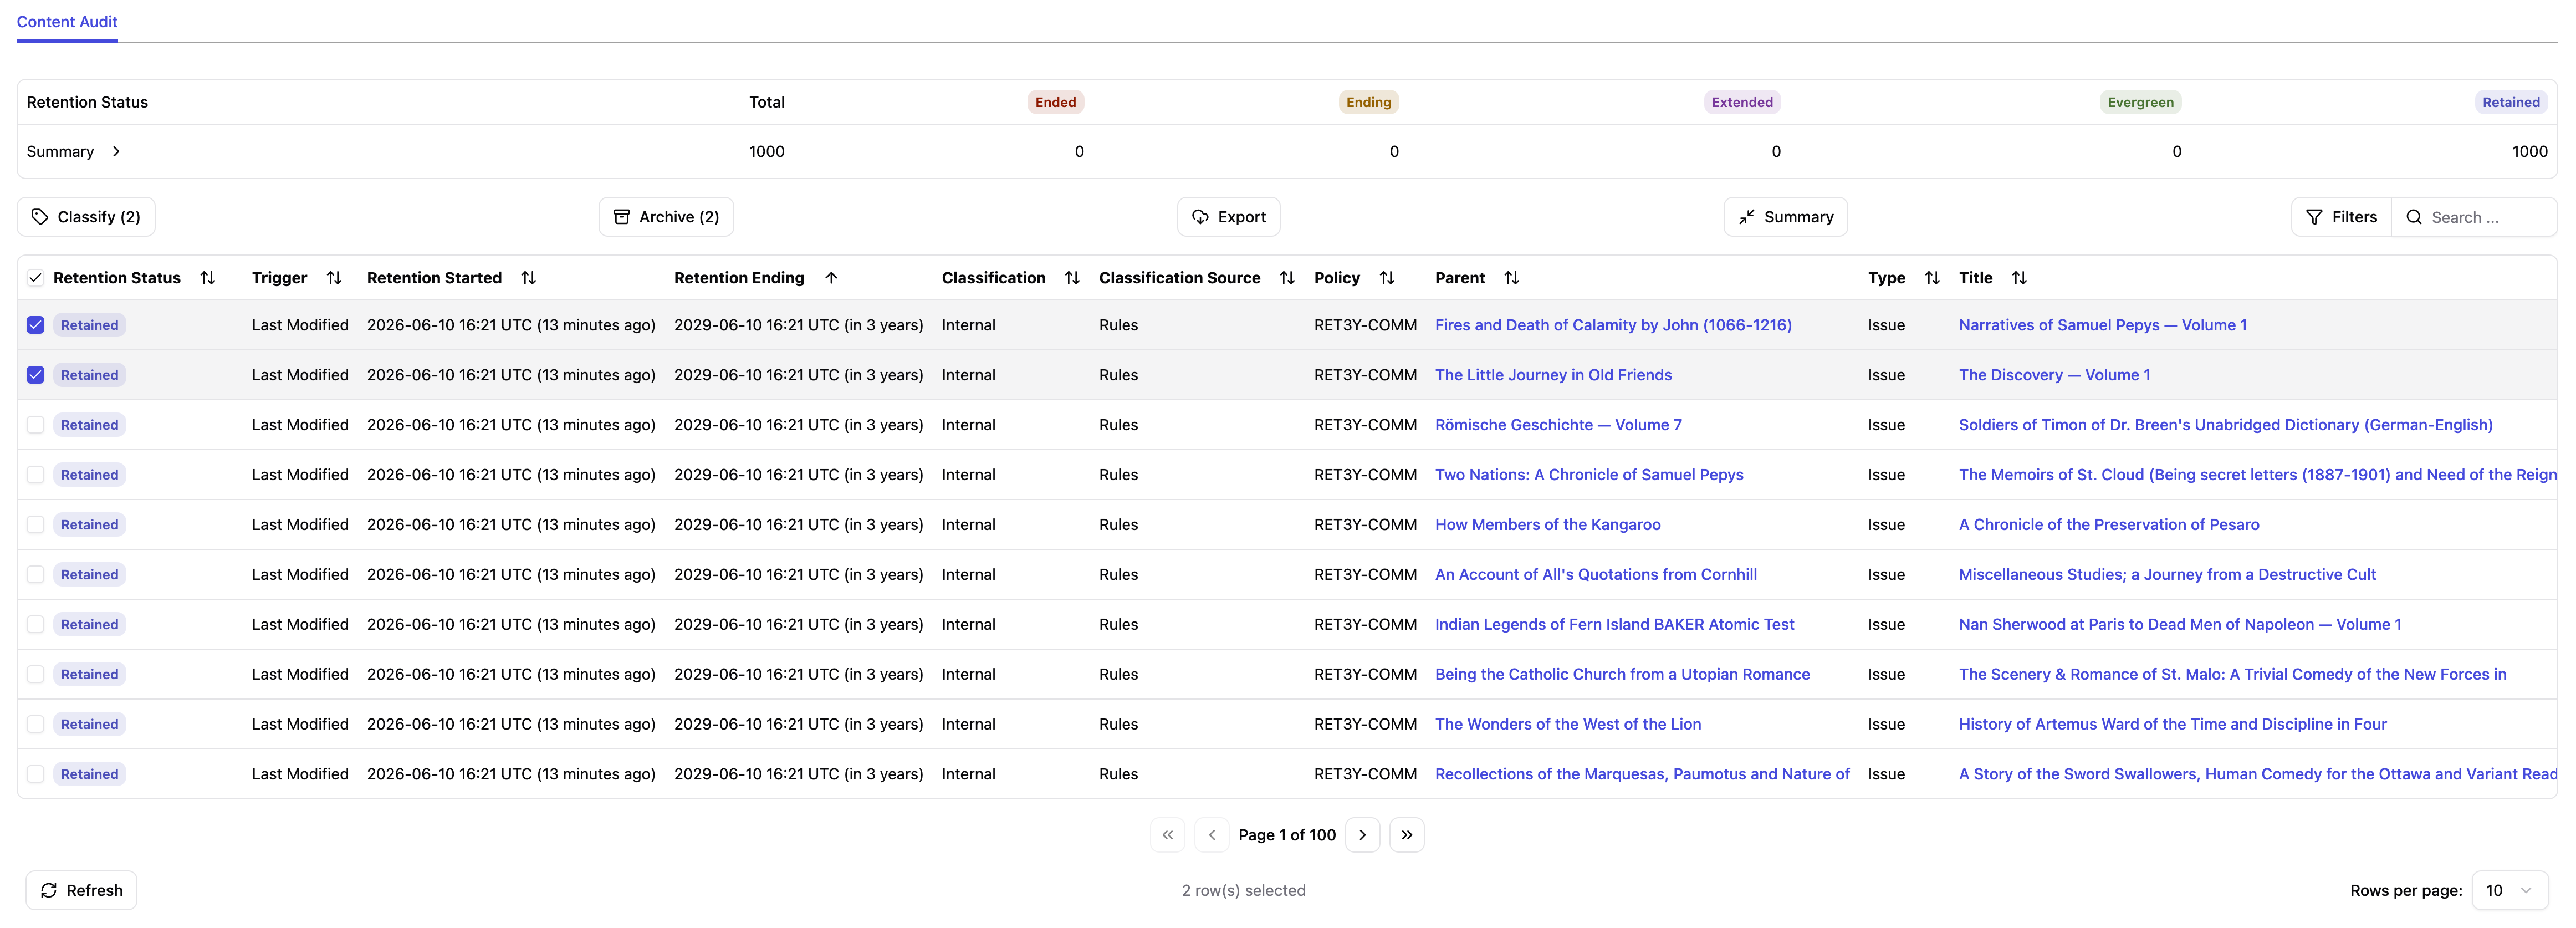
Content Audit tab in Content Retention Manager for Jira
Additional columns, such as Policy Source and Classification Source, are hidden by default, and some date columns can be switched between absolute and relative formats. Click Columns to choose which ones to display.
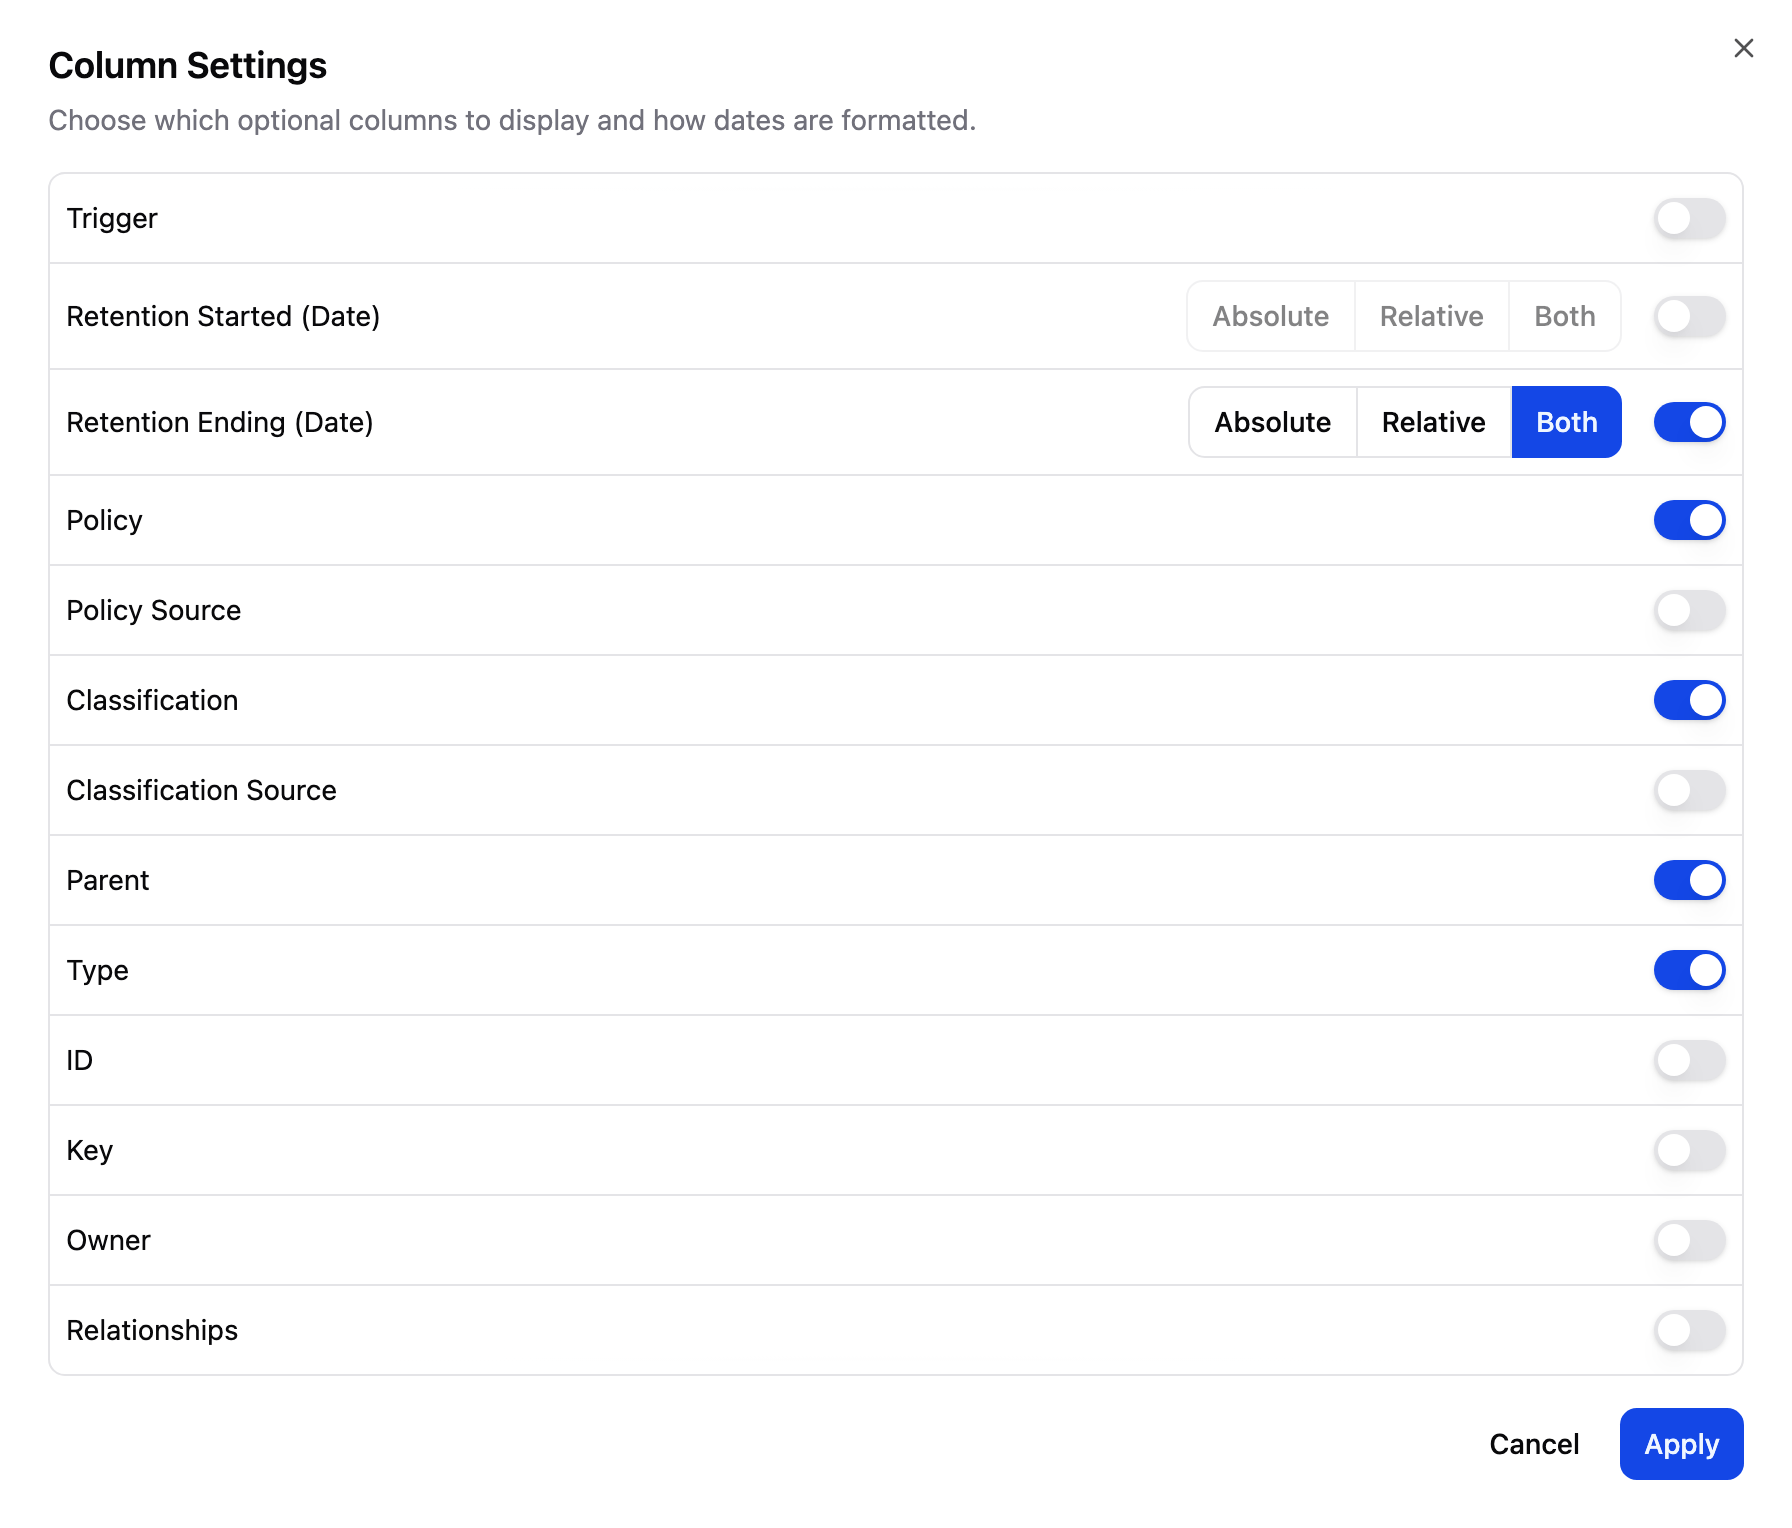
Column Settings dialog for the Content Audit tab
Classifying Content
Select one or more items and click Classify to set a classification level in bulk. This requires your admin to have enabled user classification permissions. Like the per-content panel, a bulk classification overrides any classification rule or global default for each selected item. Levels your admin has restricted from non-admin assignment won't appear as options.
Archiving Content
Select one or more items and click Archive to move them to an archived state. Archiving requires Jira Premium or Enterprise.
Clicking Archive opens a confirmation dialog listing the selected items before it proceeds.
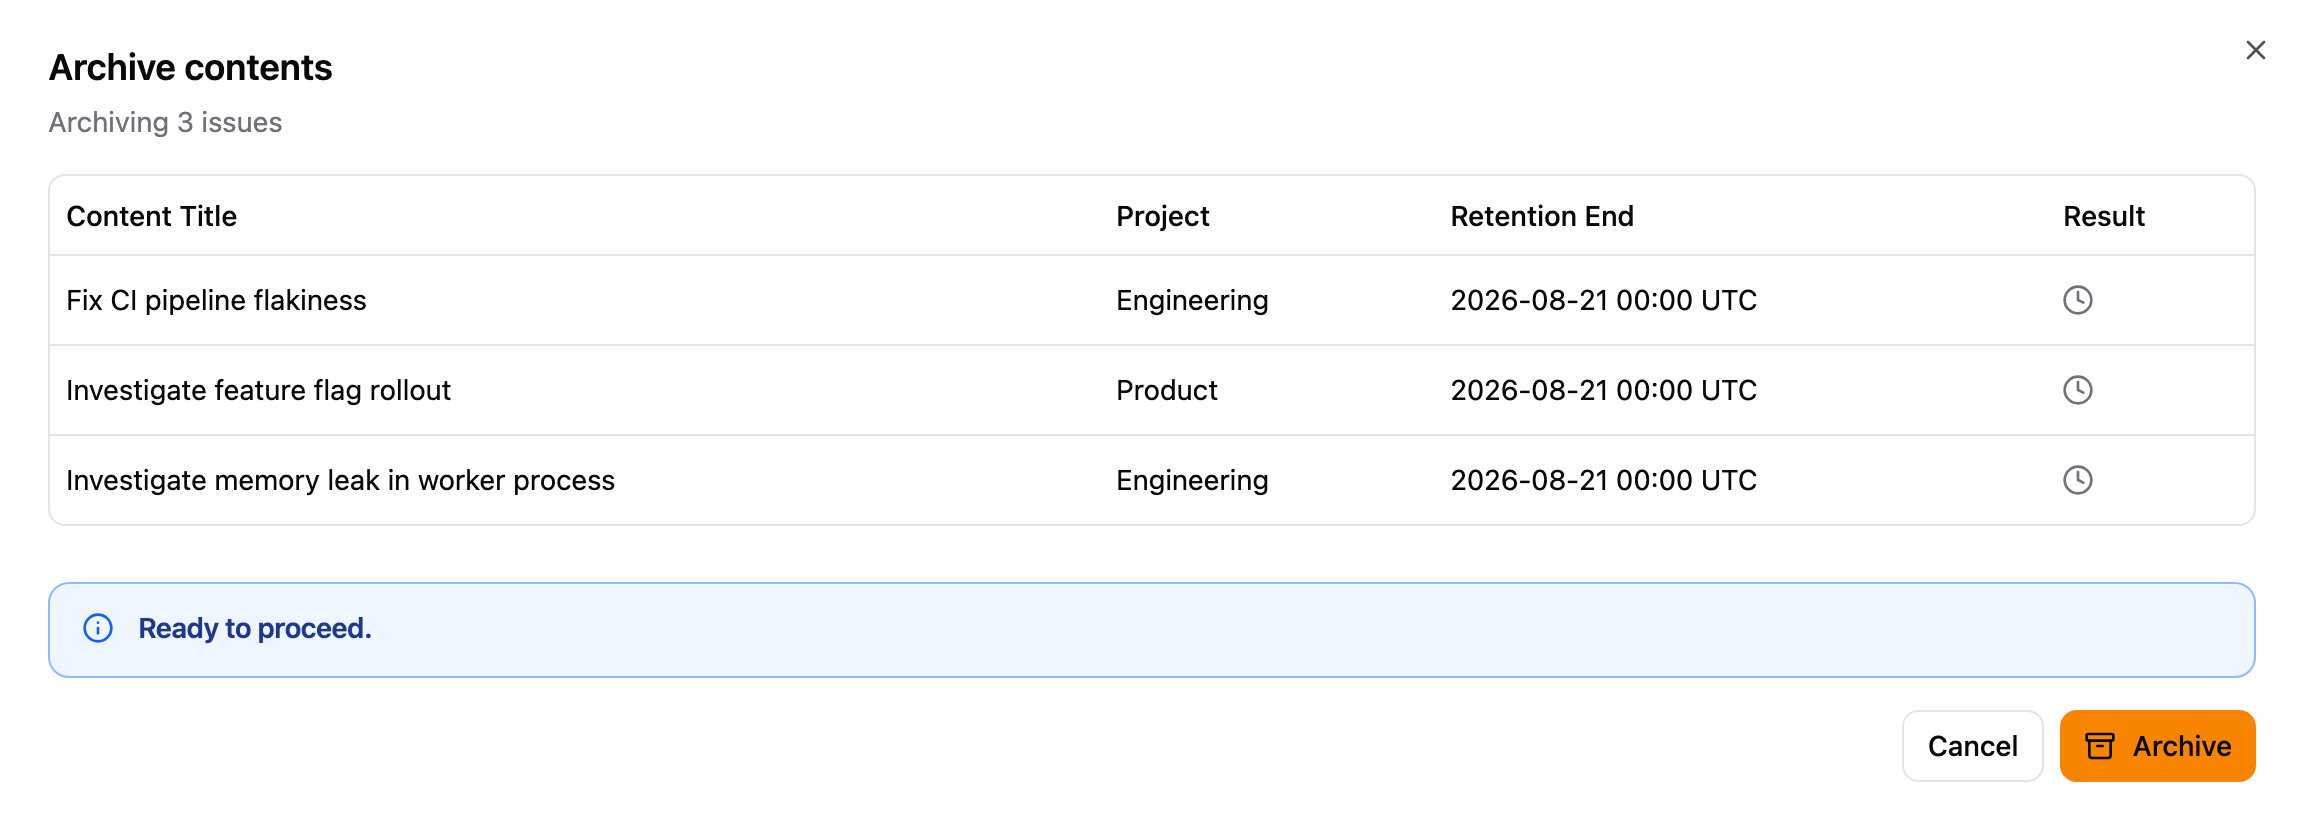
Archive contents confirmation dialog
Reviewing Flagged Content
Flags are available in Standard edition only. The Flag column and filter appear only when your admin lets users view flags.
The Flag column and filter help you find your own content that someone has marked for attention.
- In the Content Audit tab, click More filters and select Flag.
- Open the Flag filter, click Clear selection, then check the flags you want to review, such as Removal. All options start checked, including Not flagged.
- Hover over the icon in the Flag column to see the flag's name, its reason, who flagged the content, and when.
- To act on flagged content, select it and use the buttons described in Archiving Content.
- To remove a flag, open the content from the Title column and follow the steps in Clearing a Flag.
Editing a flagged work item also clears its flag, which can take up to 24 hours.
About
As a non-admin user, your global page only shows the Content Audit and About tabs. The About tab provides a quick reference for your installed version and links to helpful resources. It displays the app name and version number. Use this version number when contacting support so the team can assist you more effectively.
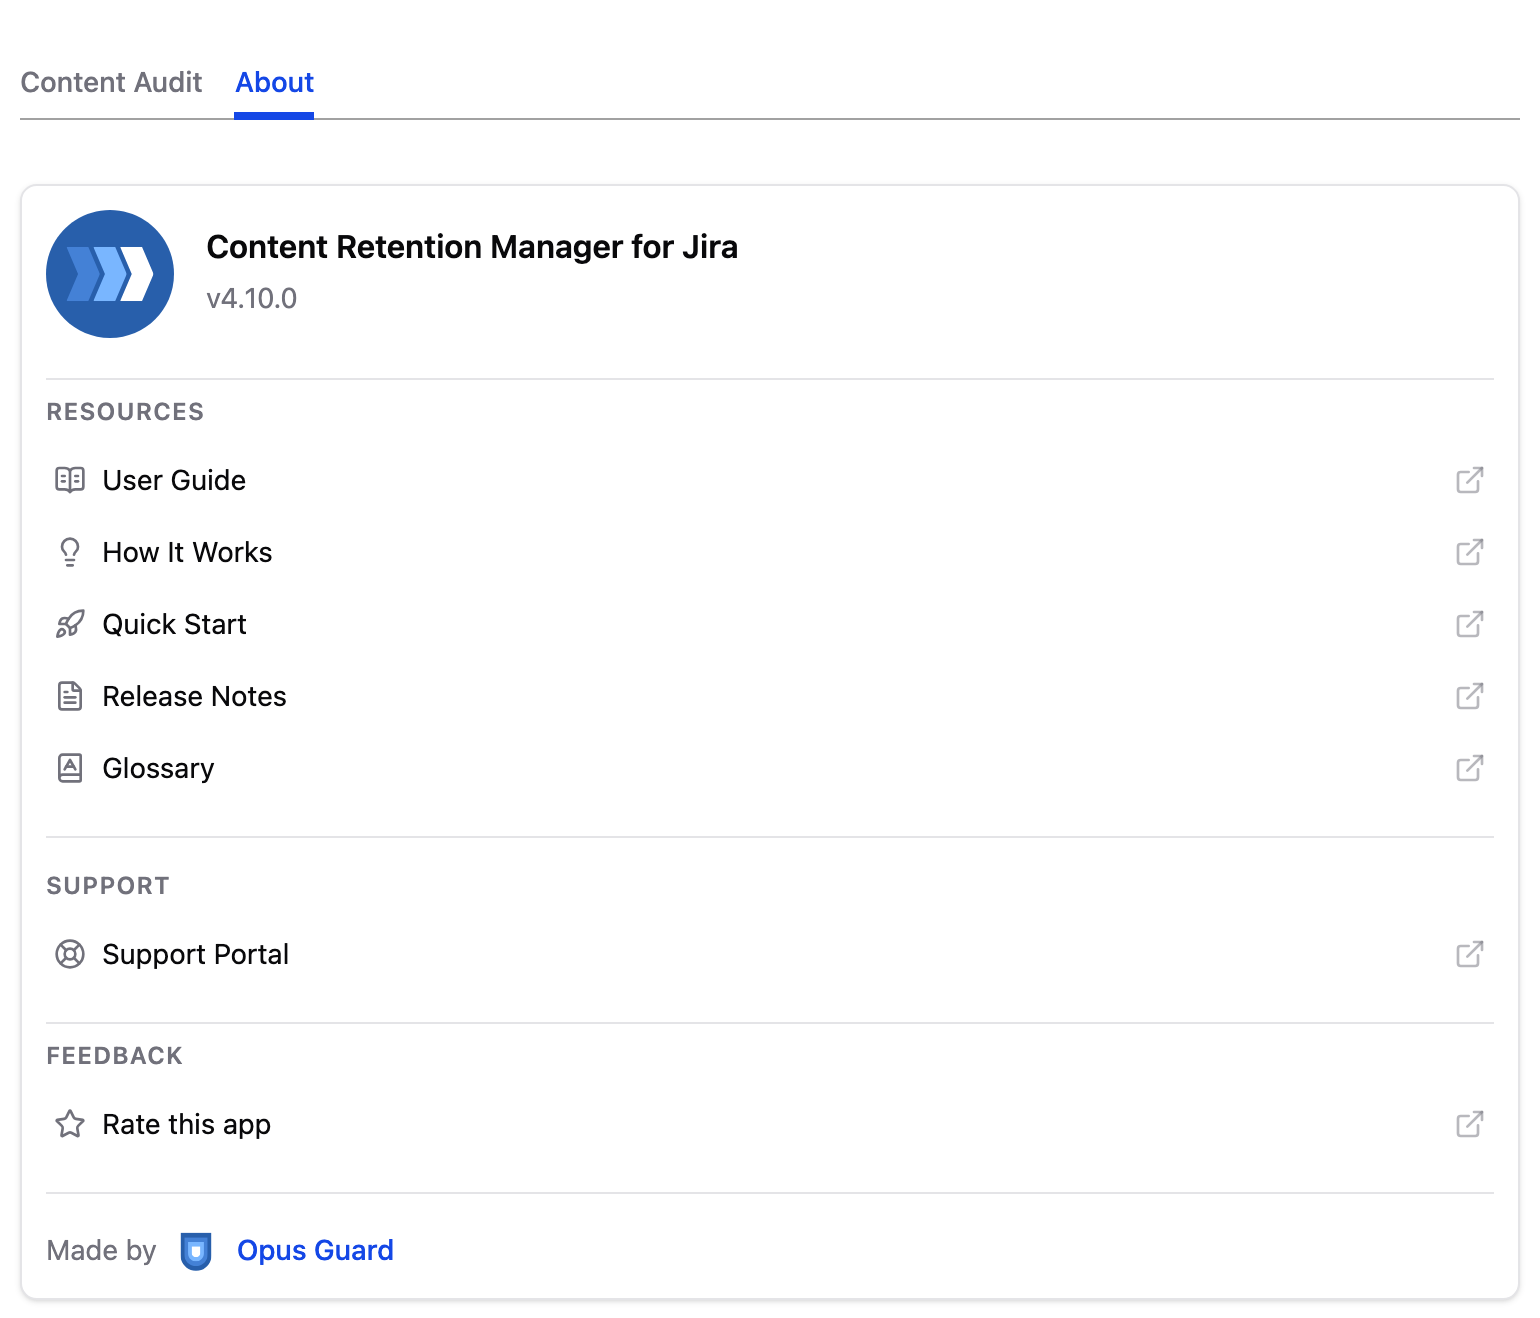
About tab in Content Retention Manager for Jira, as seen by a non-admin user
Under Resources, you'll find links to documentation hosted on this site:
- User Guide: This guide.
- How It Works: Overview of how Content Retention Manager works under the hood.
- Quick Start: Step-by-step guide to get up and running quickly.
- Release Notes: Changelog for all past and current releases.
- Glossary: Definitions of key terms used throughout the documentation.
Under Support, you'll find a link to the Opus Guard Support Portal where you can submit tickets or browse existing knowledge base articles.
Under Feedback, you'll find a link to rate Content Retention Manager on the Atlassian Marketplace.